Friday, December 20, 2013

Christmas 2013


This is exactly what I plan to do! Today is my last day working until the New Year. So crazy to think about how fast time has flown by in 2013. Tonight is our office Christmas party where we'll have a private showing of A Christmas Story, hors d'oeuvres, cocktails and good company!


We have so much to look forward to in the coming year. Our sweet niece Kate will make her debut any day now, a bachelorette party in Austin, TX for two of my favorite ladies, weddings galore, cruisin' and family beach trip. Looking forward to all that is to come and all the memories to be made.
Wishing everyone a VERY Merry Christmas and Happy New Year!
Cheers!


Wednesday, November 20, 2013


NEW FLOORS!

So the title of this post is NEW FLOORS. However, at this point, they're not exactly new. They were installed relatively quickly considering the amount of work it took. I just have been slack about posting. Chris and I were so lucky to have so much help from friends and family during this whole process. We couldn't be happier with the end result.

 The floors we chose were called Toasted Chestnut by Allen + Roth from Lowe's. For the price, they feel and look like a great quality.

Our first step was to remove all of the baseboards and lay a vapor barrier to prevent moisture from getting to the flooring. We then began the process of laying out the floors to make sure the seams varied. The hardest part of the whole process was cutting around cabinets and corners, trimming door jambs and making sure there was enough of an expansion gap for the floors to "breathe". We used spacers to help with this. 
I actually got in and got my hands dirty cutting the floors where need be and tapping them into place. I have a new respect for people who do this for a living. It is seriously hard on your body! After the floors were in we had to put the baseboards back on, patch and paint them and add the matching quarter round.

 I could seriously kick myself because I took photos of the entire process of installing the floors. They stayed on my phone for a month and then I mistakenly deleted them. Do not fret, I DO have "after" photos.


I am so happy this project is complete. In my opinion the floors alone have transformed the entire house. Thanks again to everyone who helped us mark this big item off the "to do" list. We couldn't have done it without you!

Thursday, September 5, 2013

Bon Voyage

Well, we successfully installed our new floors! I will post pictures once our baseboards are up and I can mop/clean the entire house that is now covered in saw dust.
But what this means is... WE'RE GOING CRUISIN'! Come 2014 Chris and I will be joining some of our very good friends, and we will be setting sail for the southern Caribbean. 
This trip will serve as celebration for our 2 year anniversary as well as my birthday and Chris's big 30th birthday. 

Side story: Some would find it humorous that I have come to enjoy cruising so much considering the first time I went on a cruise, my best friend Allison and I spent 90% of the trip locked in our dark interior cabin watching the movie "Just Married" on repeat and ordering turkey sandwiches from room service. However, times have changed, I've turned 21 grown up, and can now order the unlimited drink package.

Back to the cruise, 
We will leave San Juan, PR


and head to St. Thomas


 St. Kitts


St. Croix


 Dominica - where we have already booked a tour to snorkel in bubbling springs and visit waterfalls where part of Pirates of The Caribbean was filmed


and Grenada


I plan on drinking as many umbrella drinks as humanly possible, and HOPEFULLY getting a tan. Now its time to get bikini ready, HA who am I kidding, tankini ready right Meg?

Thursday, August 29, 2013

Tore Up From The Floor Up

Holy hardwoods batman! 
As you know one of the items on our home to do list was to replace our damaged hardwoods with a more durable and attractive laminate. After looking at many different floor samples for the past couple months Chris and I finally chose one. So on Sunday we bit the bullet, ordered the flooring and decided to start removing our current hardwoods.
As soon as we started, we knew we were in for quite a task. The hardwoods were heavily glued to the cement underneath, and were VERY, very stubborn. 
After cutting sections with a circular saw, both Chris and I used pry bars and hammers to remove the existing wood. 2 hours and all our blood sweat and tears (not from crying, but from a wood chip flying in my eye), we had only removed a small portion of the dining area. 


Before starting this project Chris told me that if we had to hire someone to remove and install the floors we couldnt go on a cruise next year, so believe you me, we were determined to make this DIY project work. 

So Chris did a little research, talked to some friends and family who've done similar projects in the past and decided to rent a floor scraper from Home Depot. The hope was that it would help remove the hardwoods as well as scrape up the remaining glue and wood remnants. Some reviews online said the machine didn't help at all, but we had our fingers tightly crossed.

Chris rented the scraper, and with the help of our good friend Justin they demoed the rest of the hardwoods in the dining area, kitchen and living room as well as removed all the adhesive in half a day. The cost of the machine was around $85 plus $15 on pizza to feed the hard workers, but that $100 saved us thousands (plus a vacay) since we didn't have to hire help. 

Here are some before and during photos of the demo. (sorry for the bad iphone photos)

Before
During but after  using scraper
During but before using scraper on glue and stuck on hardwoods. (Sneak peak of new curtains)
After removing wood and scraping glue - looks ugly but is so much better!


Currently our new flooring is stacked in the corner acclimating to room temperature per manufacturers instructions. The plan is to install these bad boys this weekend. I Will keep you posted on any DIY drama and of course "after" pics. Wish us (and by us, I mean Chris and handy friends) luck!


Tuesday, July 23, 2013

Summer Garbanzo Bean Salad

I'm always on the hunt for easy and healthy lunch items to bring to the office, one can only eat so many turkey sandwiches and tossed salads. When I stumbled across this garbanzo salad recipe I knew I needed to give it a whirl. The ingredients are all so fresh (and pretty too) a perfect summer lunch for the office or even a picnic! 


Summer Garbanzo Bean Salad
original recipe found via 

2 cans garbonzo beans ( rinsed and drained )
1 red bell pepper, diced
1 yellow bell pepper, diced
1 cucumber, peeled and diced
1/2 red onion, diced
2-3 garlic cloves, minced
3/4 cup feta cheese
1 tbsp italian seasoning
3 tbsp (give or take) lemon juice
2 tbsp (give or take) lime juice
1/4 cup olive oil
4 tbsp red wine vinegar 
salt, and pepper to taste

Mix olive oil, garlic,lemon, lime, vinegar and spices, whisk until well combined, set aside.
Place rinsed beans, peppers, cucumber, onion and feta cheese in large bowl. Pour over bean salad.

Would be great served with pita bread, or add grilled chicken. 

PS- I'm taking my first Pure Barre class tonight, wish me luck and pray I make it out alive!


Thursday, July 11, 2013

4th of July Weekend

I have now been welcomed back to reality by "Monday" after a wonderful and much needed 4 day 4th of July holiday weekend! We definitely kept ourselves busy but we got to catch up with some of good friends and enjoy a couple days off. Now can I please have a day to recover from the weekend?

Wednesday night we went and saw the movie "The Heat" - I love Melissa McCarthy and Sandra Bullock usually, so I was really excited to see them team up. They did NOT disappoint! While the plot line may have been a little predictable the comedy was definitely entertaining and kept me laughing, even Chris said "yeah it was pretty good" which means it was awesome (kinda). 


On the morning of the 4th of July I was gifted with a delicious surprise, CINNAMON BUNS! My friend Allison had made this recipe but failed to realize that it made about 75 rolls - lucky for me, I was a benefactor of this oversight. If you are looking for a homemade cinnamon roll recipe (and who DOESN'T love a good bun), give this one a try, I think she even had enough to freeze and save for later. Thanks Al for the yummy treat! 


We spent the rest of the afternoon poolside, and then headed to a cookout at my friend Amanda's parents house. Their neighbors smuggle the big fireworks across the border and put on a show for the neighborhood. All of us (minus Parker - the bigger they are the harder they fall) really enjoyed it, we even managed to dodge the rain. I brought my "go to" recipe - Pasta Salad


Ingredients:
Tri Color Rotini
Mini Pepperoni
String Cheese (or other block mozzarella)
Cherry tomatoes (optional)
Green peppers
creamy caesar salad dressing
zesty italian salad dressing

Directions:
Cook rotini noodles to al dente, drain and rinse with cold water
cube string cheese and dice green peppers
combine all ingredients and add a 2:1 ratio of italian dressing and creamy caesar -  stir until noodles are well coated
cover and refrigerate for several hours, add a splash of italian dressing before serving

On Saturday we made a little day trip to Durham to help our good friends Chris and Lauren pack and prepare for their upcoming move.  Lucky for us we only had to work a little bit and then got to spend the rest of the day hanging out. We hit the pool until the boys got bored, 15 minutes in, went to a local brewery Lonerider and ended the evening with a boatload (literally) of sushi. We always love spending time with these two and wish we lived closer so we could see them more often.

Sunday we packed up the pup and went to see our friend Shannon at her house on Lake Tillery. We spent the afternoon catching up and watching the dogs swim. Parker is a little fish and its just so much fun to watch him in his element.


We had a great weekend hopping around NC, spending time with great friends and celebrating the 4th. I can't believe how fast this year is flying by!

Tuesday, July 2, 2013

Beauty Buy: Wet Brush

As "they" say, the grass is always greener on the other side. If you have blonde hair you want brunette hair, if you have curly hair you want straight, well i'm here to tell you I have the worst of all hair worlds. I have fine hair, but a lot of it, I have waves but not enough to look cute when it air dries, and worst of all my hair tangles like the dickens (yes I just said dickens), especially when its wet. 
Now ever since I worked at the hair salon 5 years ago - don't want to talk about it - I've had the same hair brush and never really thought about exploring new options, my theory "if it aint broke dont fix it." But this past weekend during my routine once a year hair appointment (what can I say, I'm cheap), I was introduced to a product that has changed my world (its only been 4 days but so far so good). 
Yes, it may look like an ordinary paddle brush, but my friends, it is NOT. This little guy can comb through the tangliest of wet locks and glide right through as if I had left the conditioner in my hair. I do not know its secret, all I know is that I am no longer losing chunks of hair as I try to rip through the knots. If you're like me and your hair is a hot mess after a shower, give this product a try. You will NOT regret it.

Monday, July 1, 2013

Dip it

This weekend I tried out yet another Pinterest recipe and boy was it a hit! Seriously, I don't think I've ever made something that got such rave reviews, and it was super easy too! I served it with fresh cucumber slices and warm flatbread and they were the perfect pairing for this delicious summer appetizer

I wish I had taken a picture of my own dip but trust me, it looked the same

Lemon and feta dip
8oz feta cheese, crumbled
Zest + Juice of (1) large lemon
1 clove minced garlic
6 tablespoons olive oil+ extra for serving
cracked pepper for topping

Place feta, lemon zest and juice, garlic and olive oil in a blender or food processor and blend until smooth. 
(personally I think a food processor will work best, but work with what ya got)
Spoon into a bowl and drizzle with a little olive oil and sprinkle with fresh cracked pepper
Dig in! 


(original recipe and photo credit linked to image)

Follow my blog with Bloglovin

So I think its pretty clear that I'm not the world's best blogger. While I do consider myself pretty social media savvy thanks to my position at work, I'm still new to the blogging game. I kept hearing things about how google reader was going to be no more and that I would need to find a new way to keep up with all my blogs. Personally I never really used google reader, I followed my blogs in the worst way possible, typing the URL in and hoping my cookies would remember the exact address - lame I know, I mean am I 50 yrs old and don't know how to use word processor?
Enter Bloglovin I can put any and all blogs that I follow on this one site and even be notified on my toolbar when the blogs I follow have new posts. Even better I can now clear my browsing history so my boss can't see what I look at during my lunch break (HA more like all day). So if you're slow on the uptake like I am, check it out, and be sure to follow my blog - you can click on the headline "follow my blog with bloglovin" to go straight there! 


Friday, June 14, 2013

TGIF

After a long week puppy-sitting and Chris being on call for work this picture (that reminds me WAY too much of Parker) couldn't be anymore accurate.


Hope everyone has a great weekend!

Tuesday, June 4, 2013

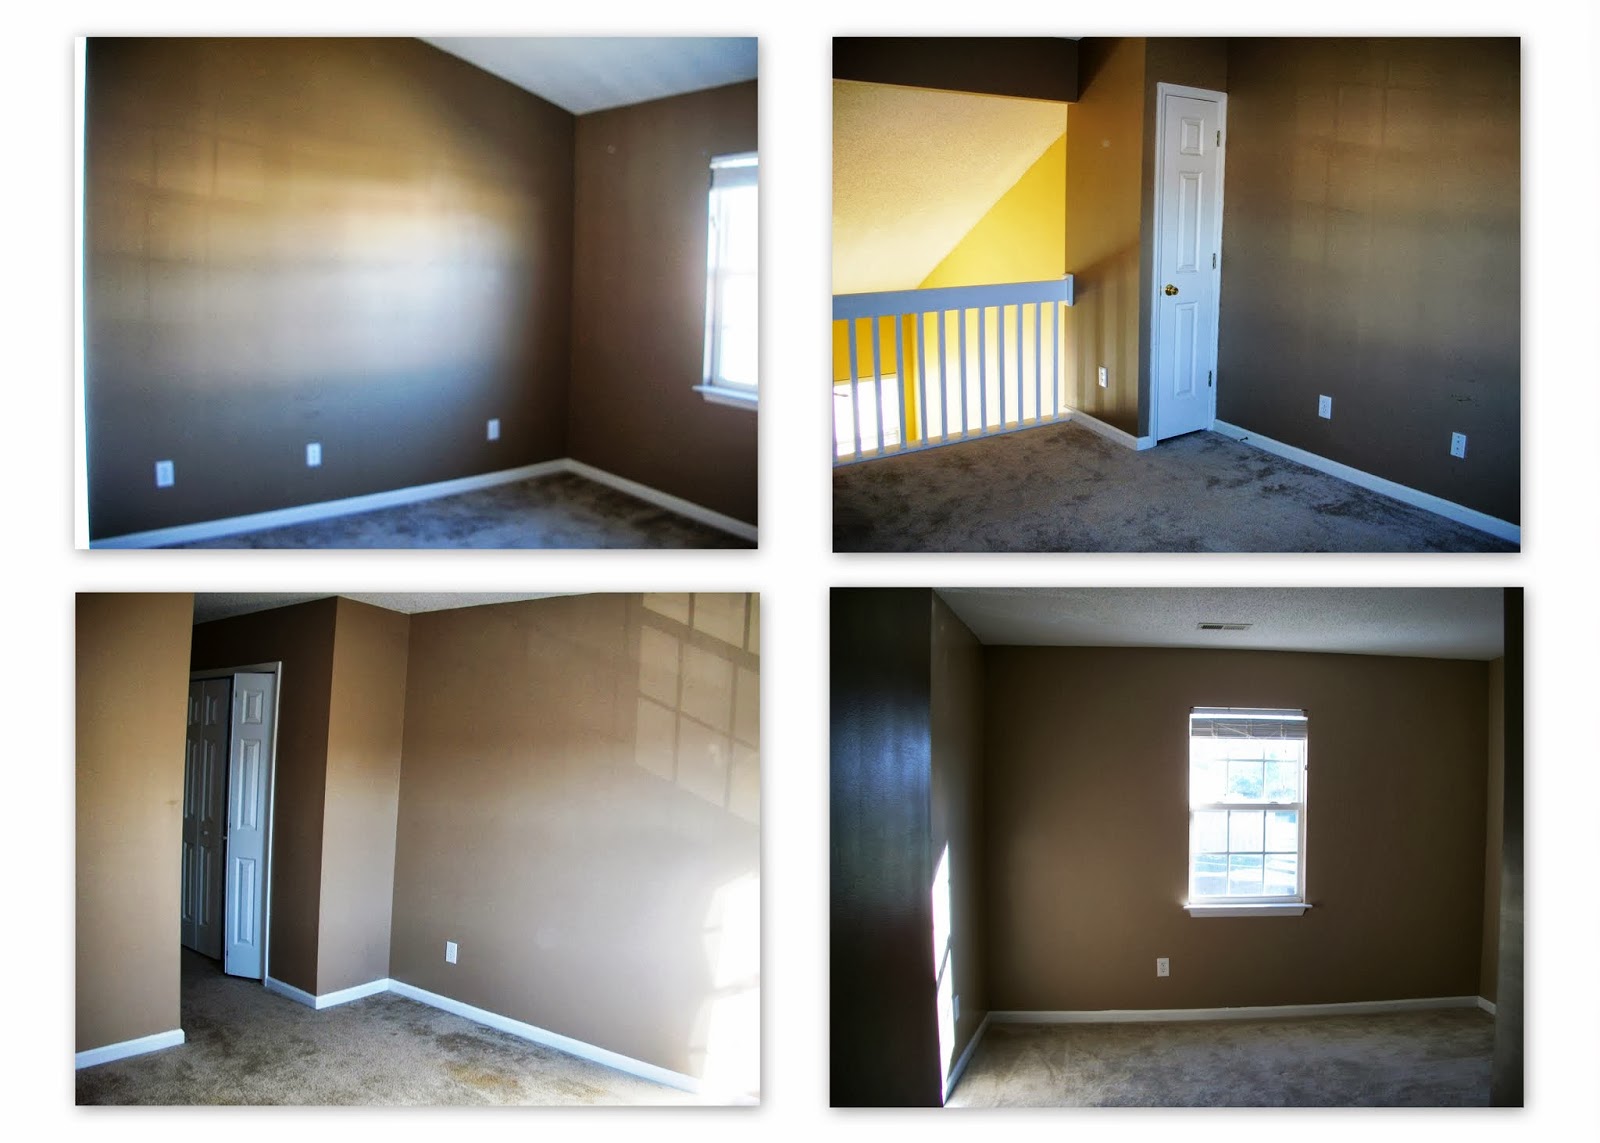
House "Before" Pictures

I think I've mentioned before that when Chris and I purchased our house it was a foreclosure. The previous owners used it as a litter box. As in, they allowed their cats to use the carpets as their toilet. Lovely really. 
I've promised some "before and after" pictures of the house so today I'll start with "before". Some of the pictures don't look THAT bad. But remember you cant smell over the internet. 


I think the stairs were the cats favorite spot
As you can see there are a lot of stellar paint colors/techniques as well as awesome brass light fixtures. 
Don't get me wrong, we did luck out with some pretty great kitchen applicances, but the majority of the house definitely needed some cleaning up and updating. When we first got the keys Chris and his dad got to work ripping the carpets and baseboards out, scrubbing the walls, and bleaching the subfloor before sealing it with Killz (I totally would have helped but I was on my bachelorette party - bad timing or good timing? you be the judge). We then had new carpets installed and all the walls, doors, ceilings and trim painted.. Stay tuned for some "after" pics. Maybe it would be more accurate to say "in progress" pics as I don't think I'll ever feel like a room is finished!

Monday, June 3, 2013

A few house updates

Well, looks like I've done it again. Completely neglected my blog, for all of you who have been checking for updates I apologize, and for those who haven't, you've obviously not missed anything. During my little blogging hiatus I have made a few updates to the house, or at least made purchases for the updates. 

As you may remember from my Home To Do List a few items that I've been meaning to get to are:

Making a wreath for my front door - I love the look of the fluffy burlap wreaths that people have been making, but being the cheap-o that I am, I just couldn't stomach the steep price tag. Enter Hobby Lobby and the 50% off sales. All of my supplies (minus the $2.99 metal base which I used a 40% off coupon for) were 50% off making the total price of this wreath project $18.

Definitely not an exact replica of my inspiration wreaths but not a far cry, and MUCH MUCH easier on my wallet.

Another project scratched off my to-do list; picking a fabric for curtains. I took the pillows I currently have in my living room to the fabric store to make sure everything would coordinate. I decided on the Khanjali Glacier and was pleasantly surprised with how everything came together. I ordered enough fabric for (2) 96" curtain panels and (2) 18x18 pillows, about 6.5 yards. I cant wait for the fabric to come in - thanks in advance to my mother in law for helping me with the sewing portion of this project

I've also been working on sprucing up our back patio. 
I've added a few plants as well as a little herb garden/lattice thingy


I also decided it was time to replace our current outdoor light
Isn't she a beaut? Just image more rust and way more bugs in the jar
with a more substantial updated light


Fingers crossed it looks good! I just happen to think its the little upgrades that make a world of difference!

While I haven't gotten to everything on my list I am definitely making progress! I will post pictures of the finished curtains (once my MIL makes them) and installed light fixture (once Chris installs it) - hey, I have the ideas not necessarily the skill :)